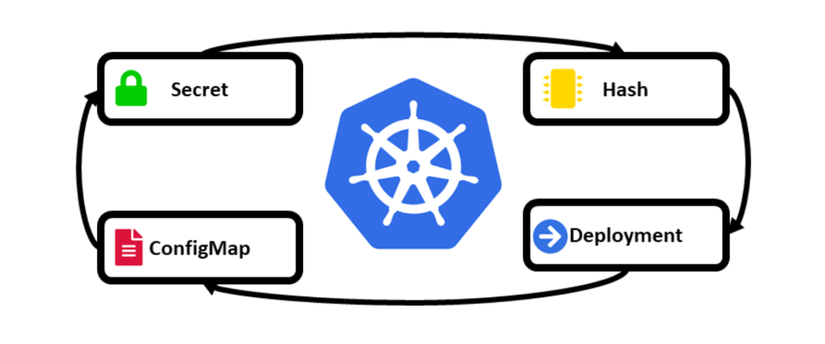
The problem
Instead, it requires us to take manual action — deleting the pod to recreate it, or doing a rollout restart — before the application picks up the new config. I think this is a feature meant to reduce accidental infrastructure changes, but it can also be inconvenient for DevOps/SRE folks who want an application to automatically pick up new config without adding a Rollout step in CI/CD or doing it by hand.
Exception: some applications, like NGINX, can automatically detect a change and load the new config without needing a restart
Automatically updating an application when its Configmap or Secret config changes is useful in cases like:
- Environments that don't require high stability (Dev, Staging)
- Environments where config changes frequently.
- Environments where Dev manages the application config and DevOps/SRE manages the infrastructure => Auto-reload reduces manual busywork for DevOps/SRE.
- Applications with properly configured Readiness, Liveness, etc., that don't experience downtime on a rollout update.
- ...
Where there's a need, there's a solution! I happened to be shown a pretty neat tool by a friend that can automate updating an application whenever a Configmap or Secret changes — I found it quite handy but noticed not many people know about it, so I figured I'd write a post to share it while it's fresh 🤣🤣🤣
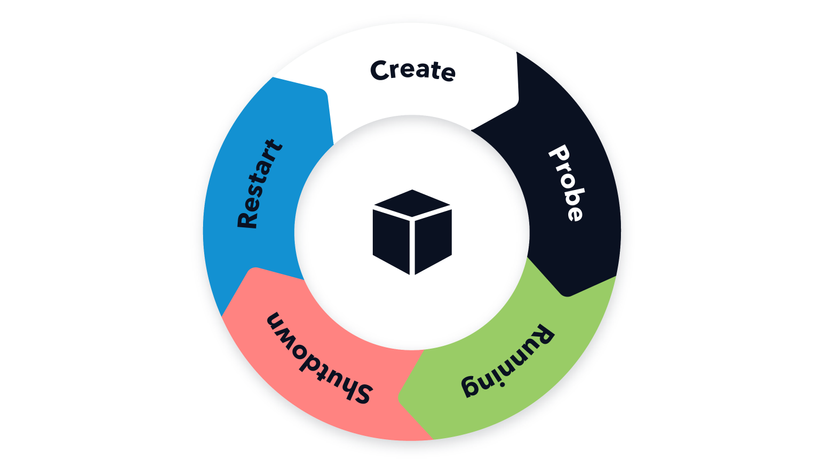
The Reloader tool

The Reloader tool is an open-source tool developed by Stakater.
Reloader is a Kubernetes Controller that continuously watches the specified Configmaps and Secrets for changes. If a change occurs, the Controller updates the Deployment/StatefulSet/DaemonSet/Rollout that's using that Configmap/Secret, so the application runs with the latest config.
Installing Reloader
Since it's a Kubernetes Controller, Reloader gets installed directly on the Kubernetes cluster you want to apply this tool to. Reloader is fairly easy to install — you can install it by directly applying the manifest file
kubectl apply -f https://raw.githubusercontent.com/stakater/Reloader/master/deployments/kubernetes/reloader.yamlOr you can also install it using Kustomize or Helm Charts with more configuration options.
See the tool's official documentation for more: github.com/stakater/Reloader
For simplicity in this post, I'll install it by directly applying the manifest file:

From the image above you can see a Deployment named reloader-reloader gets created, along with a serviceAccount - ClusterRole - ClusterRoleBinding to grant this tool permission across the entire Cluster.
By default, this tool watches for Configmap and Secret changes across the entire cluster. That's why it needs to create a ClusterRole.
Trying it out
In this section, let's try out how this tool actually behaves with a simple demo.
I'll try changing the config of a Python web app that echoes out an environment variable named RANDOM_ENV. This environment variable gets mounted into the deployment via a secret. The steps we'll go through are:
- Write the Python webserver code (Flask)
- Dockerize it
- Push the image to Dockerhub
- Create the necessary k8s resources (Secret, Deployment, Service)
- Try changing the secret before Reloader is installed
- Install Reloader and configure it for the deployment
- Try changing the secret after Reloader is installed.
1. Write the Python webserver code
from flask import Flask
import os

app = Flask(__name__)

@app.route('/')
def echo_random_env():
    random_env_value = os.environ.get('RANDOM_ENV', 'Environment variable RANDOM_ENV is not set.')
    return f'The value of RANDOM_ENV is: {random_env_value}'

if __name__ == '__main__':
    app.run(debug=True, host='0.0.0.0')
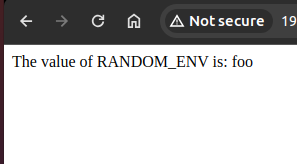
The code above runs a web server and displays the value of the RANDOM_ENV environment variable stored in the pod. You can use the command export RANDOM_ENV=foo then run the webserver with python main.py and you'll see the content displayed like this:
2. Dockerize
The Dockerfile used to dockerize this application is as follows:
# Use an official Python runtime as a parent image
FROM python:3.9-slim

# Set the working directory in the container
WORKDIR /app

# Copy the current directory contents into the container at /app
COPY . /app

# Install any needed packages specified in requirements.txt
RUN pip install flask

# Make port 5000 available to the world outside this container
EXPOSE 5000

# Run app.py when the container launches
CMD ["python", "main.py"]
3. Build and push the image to a Registry (Dockerhub)
Build and push the python application image to Dockerhub so it can be pulled in Kubernetes.
docker build -t docker.io/nguyenhoangviet3/reloader-test:latest .

docker push docker.io/nguyenhoangviet3/reloader-test:latest
This test's image is docker.io/nguyenhoangviet3/reloader-test:latest — you can point straight at it to run without rebuilding, if you'd rather not build it yourself.
4. Create the K8s resources
To run this test, I'll need to create 3 resources:
- Secret (stores the RANDOM_ENV value)
- Deployment (the resource running the python application)
- Service (used to expose the service for testing)
Secret manifest
apiVersion: v1
kind: Secret
metadata:
  name: random-env-secret
type: Opaque
data:
  RANDOM_ENV: "Zm9vCg==" # value Zm9vCg== is the base64 encoding of the word foo
Deployment manifest
apiVersion: apps/v1
kind: Deployment
metadata:
  name: flask-app
spec:
  replicas: 1
  selector:
    matchLabels:
      app: flask-app
  template:
    metadata:
      labels:
        app: flask-app
    spec:
      containers:
      - name: flask-app
        image: nguyenhoangviet3/reloader-test:latest
        ports:
        - containerPort: 5000
        env:
        - name: RANDOM_ENV
          valueFrom:
            secretKeyRef:                                # Defines pulling the value from the secret above
              name: random-env-secret
              key: RANDOM_ENV
        volumeMounts:
        - name: secret-volume
          mountPath: /var/run/secrets/random-env-secret
          readOnly: true
      volumes:
      - name: secret-volume
        secret:
          secretName: random-env-secret
Service manifest
apiVersion: v1
kind: Service
metadata:
  name: flask-app-service
spec:
  selector:
    app: flask-app
  ports:
    - protocol: TCP
      port: 5000
      targetPort: 5000
  type: NodePort
After creating the resources above, we get a pod and service like in the image.

5. Try changing the secret before Reloader is installed
To change the secret, we use the following command to directly edit the secret we created earlier:
kubectl edit secret random-env-secret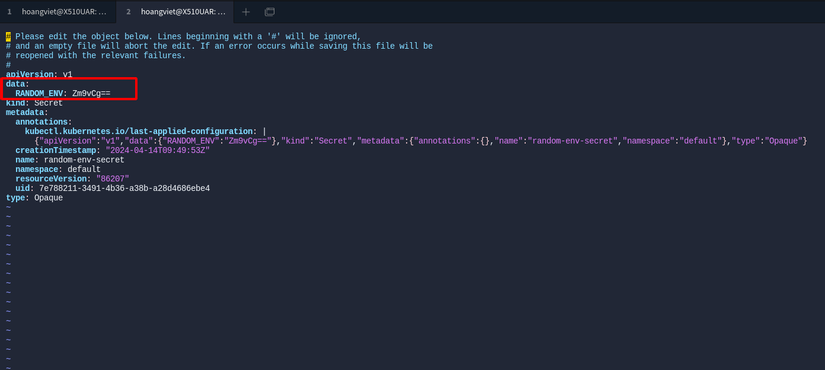
We'll change the value in the data field from "Zm9vCg==" (foo) to "YmFyCg==" (bar) and access the application via NodePort at NodeIP:NodePort to see if it changed.
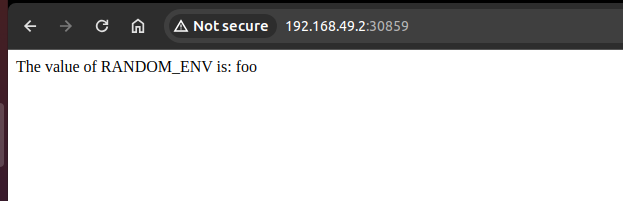
In my environment, the address to access the application via NodePort is http://192.168.49.2:32496/, where 192.168.49.2 is the Node IP and 32496 is the NodePort of the service created.
Even though the secret was changed to bar, the value displayed will still be foo
6. Install Reloader and configure it for the deployment
I already covered the install steps above — pick whichever install method suits you.
To also enable the auto-update feature when a secret or configmap changes for a Deployment/Statefulset/Daemonset/Rollout, you need to add an annotation to that resource. Specifically, you'll need to add the following annotation to the deployment:
annotations:
  reloader.stakater.com/auto: "true"
You can edit the deployment directly, or use the following command to attach the annotation to the deployment
kubectl annotate deployment flask-app reloader.stakater.com/auto="true"That simple, and we've now told the Reloader controller to automatically watch for config changes for this flask-app deployment.
7. Try changing the config once Reloader is configured
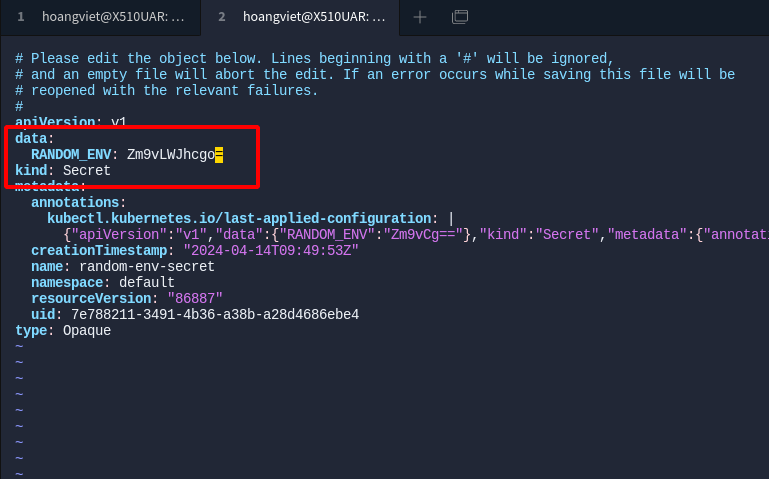
Similar to step 5, now we'll change from "bar" to "foo-bar". The base64 of 'foo-bar' is "Zm9vLWJhcgo="
kubectl edit secret random-env-secretThe secret manifest after the change. Save the change.
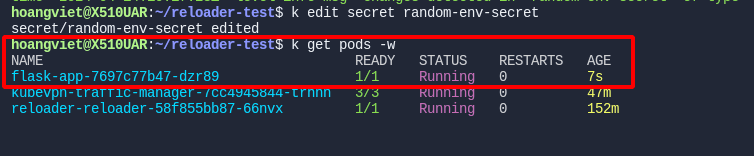
We can see a new pod got recreated right after the secret changed:
Checking the logs of the Reloader Controller pod, we can also see the event where the Controller caught the secret's change

And when accessing the application again through the browser, the displayed content has also automatically changed to foo-bar 😸😸😸
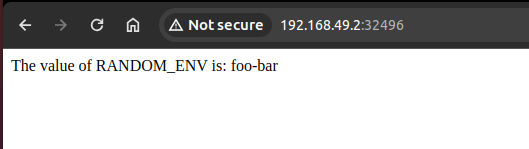
So we've successfully tested automatically updating an application whenever a config change happens in the secret the application uses.
Wrapping up
Reloader also supports configuring monitoring by application, by namespace, by label, etc. — check the documentation on GitHub for more.
Hope this post helped you out a little bit in your work. If you found it useful, please Upvote and Follow me to read more posts about DevOps, SRE topics 😄 !!!
Have a nice day!
If you're running into technical challenges or need help with systems, DevOps tools, I'm confident I can help. Get in touch at hoangviet.io.vn