What is Python Celery?
For anyone not too familiar with Python Celery yet:
Python Celery is an open-source framework used to build asynchronous task-processing systems. With Celery, you can design a task-processing system without being limited by processing time or the number of tasks that need to run.
The benefits of using Celery include:
- Increases processing efficiency with the ability to handle asynchronous tasks.
- Reduces waiting time for users.
- Increases system reliability by processing tasks in a distributed way.
- Easy to integrate with other frameworks like Django, Flask, and Pyramid.
Celery can be used to handle heavy tasks, complex computation, interacting with other systems, and in web or mobile applications. For example, Celery can be used to handle tasks like sending emails on behalf of users, generating complex reports, or analyzing large amounts of data.
With its powerful features, Python Celery is a great choice for developers who want to build asynchronous task-processing systems, boosting the efficiency and reliability of their applications.
The model
Celery's operating model looks like this:
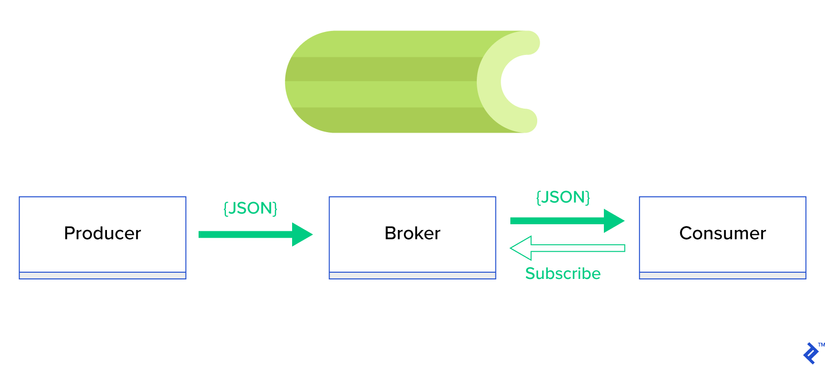
Producers send Tasks into a Broker to push into a queue — the Broker here can be (RabbitMQ, Redis, Amazon SQS, etc.). Consumers are Celery Workers that continuously listen for tasks added to the Broker to pull them out and process them.
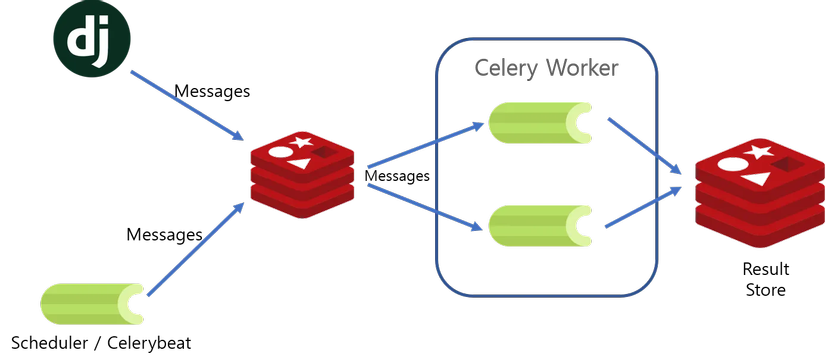
Today I'll use a fairly popular Broker, Redis, to store tasks — the model in this post will look like this:
Setting up Redis
To use the Serverless platform Bizfly Cloud App Engine, you need to register an account here: manage.bizflycloud.vn/register
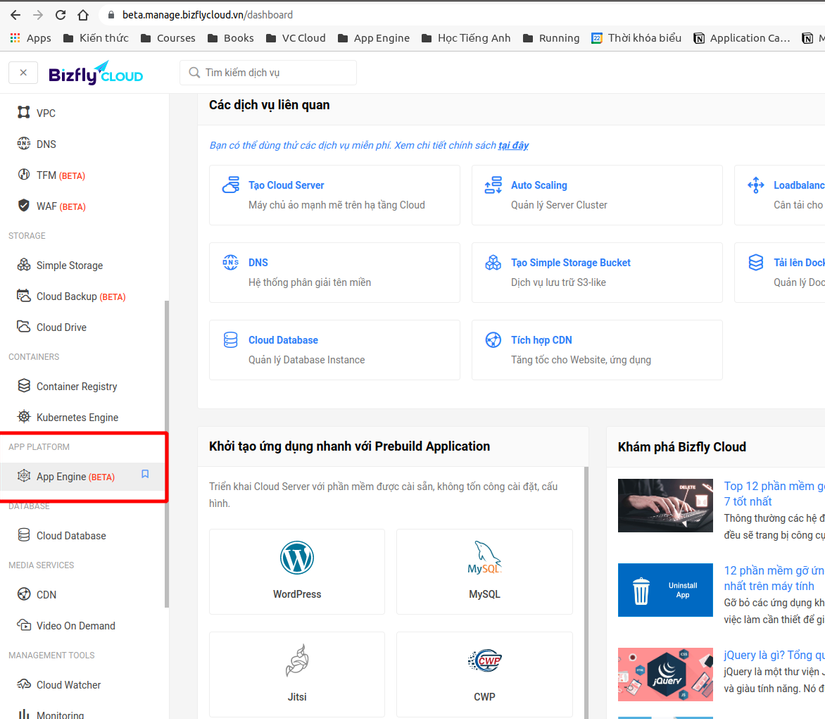
Once you've created an account and logged in, find the App Engine service in the left-side menu
Let's start by creating the first App named worker-example. Once created, we'll get moved into the Service creation page — here we scroll down to OneClick Service Deploy and choose Initialize Redis.
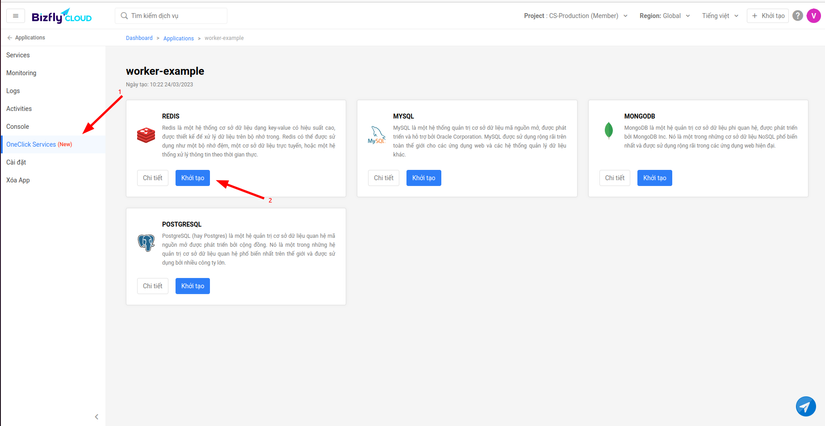
Choose an appropriate config and configure a username/password if needed. If you don't configure a username/password, the system will generate one randomly.
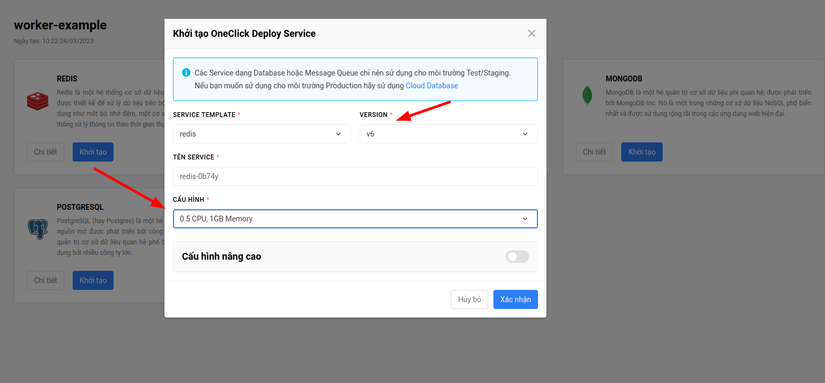
Once selected, hit confirm to create it. After a few minutes, Redis will be up — choose Details to get the connection info to Redis.
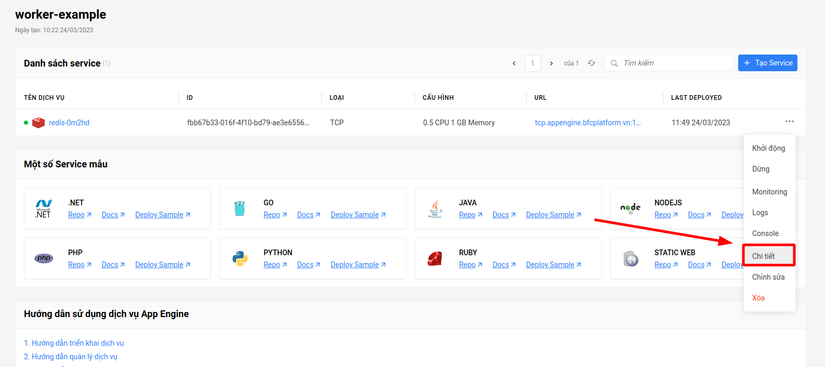
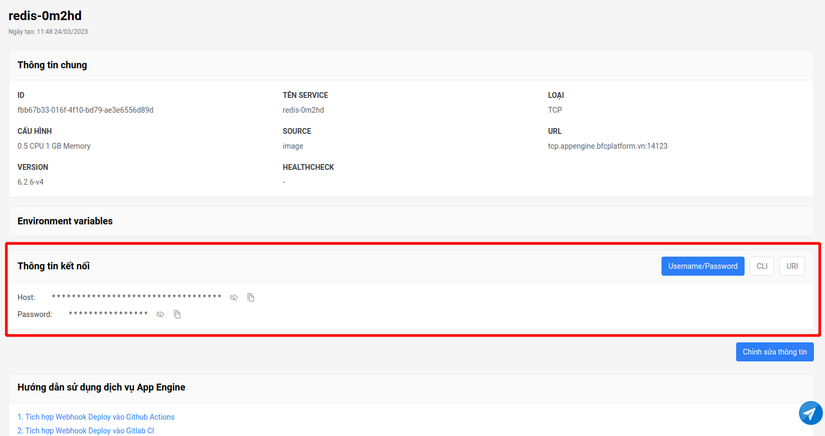
So now we have a broker to store tasks. Next, we'll write a simple bit of Celery code that acts as the Consumer and deploy it to run on App Engine.
Setting up the Consumer — Celery Worker
Installing libraries
You need to install a few libraries to run Celery with Redis, with the command:
pip install celery celery[redis]Creating the project code
First, let's create a file tasks.py with the content:
from celery import Celery
app = Celery('tasks', broker='redis://:H47FH4d4JLjpPJpp@tcp.appengine.bfcplatform.vn:14123')

@app.task
def add(x, y):
    return "Gia tri da tinh duoc: " + str(x + y)
The file above creates a Celery worker connected to the Redis we created earlier, configured in the broker= field, along with a simple add function that adds 2 numbers and returns the result. Pretty simple, right? 😄
Note: We'll use the connection URI for the Redis connection info.
Defining the Run command
We need to define a Run command (the command used to run the application) for Python applications. Let's create a file named Procfile with the content:
worker: celery -A tasks worker --loglevel=INFOCreating a requirements.txt file
You need to create this file so the App Engine system knows which libraries your application needs installed. You can create it with the command: pip freeze >> requirements.txt
Defining the Python runtime (if needed)
You can also define the Python Runtime by creating a runtime.txt file with the python version as its content, for example:
python-3.11.0If you don't define a Runtime, the system will run your code with the latest Runtime version, 3.11.
In the end, our project will have the following files:
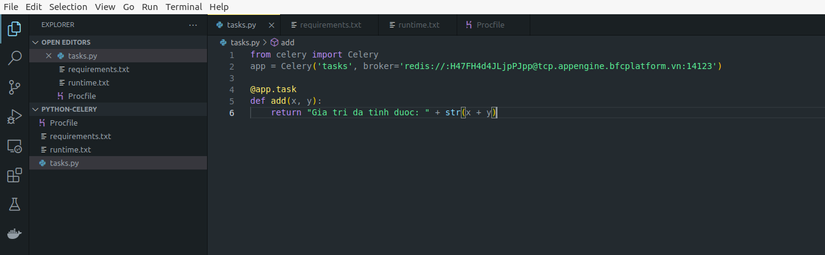
Creating a Worker service on App Engine
Now that the code is ready, we move to the next step — deploying this source code to Bizfly Cloud App Engine. Back on the service list screen, we choose Create Service.
Here I'll create a service named celery-worker, and for deployment info I'll choose Upload to push code up from my machine directly, though you can also push to Git or package it as an image.
For the application type, we'll choose Worker. A Worker-type service can't be accessed from outside.
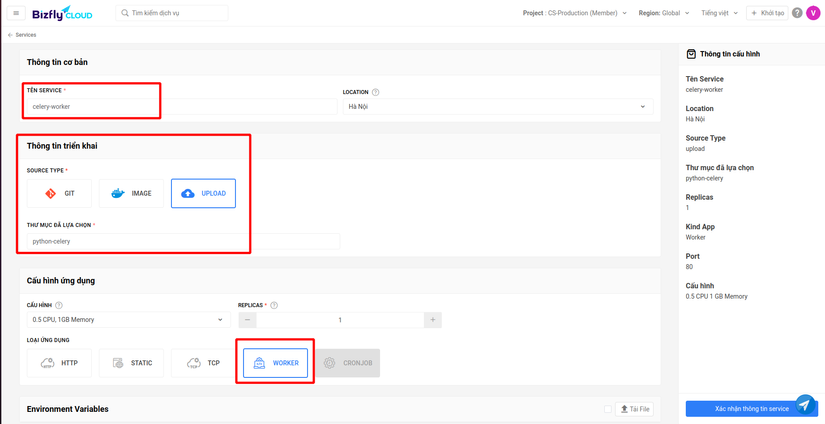
Once all the info is filled in, hit Confirm service info to create it. In just a few minutes your Worker service will be deployed successfully.
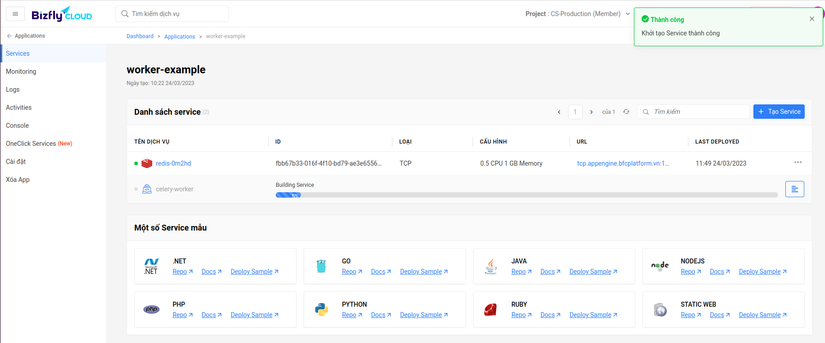
Trying it out
So we've finished deploying the worker running on the Serverless platform — now let's try pushing a task in to see whether the worker receives and processes it.
In the folder containing the code, we run the following 2 commands in a Python interpreter:
from tasks import add

add.delay(5,12)
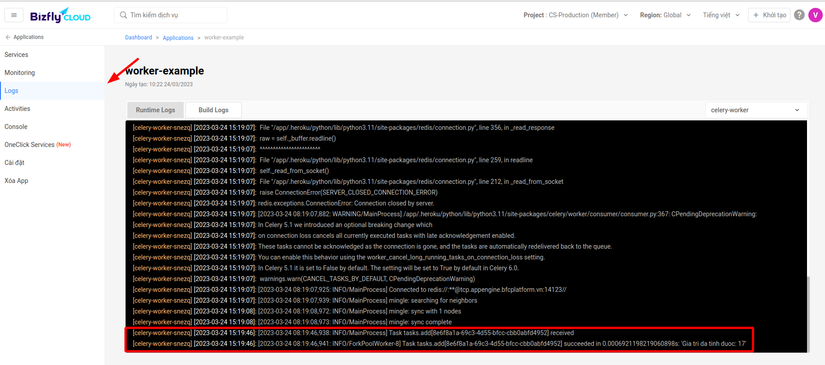
Going into the worker's Logs, we see the worker received the task and processed it! 😁😁😁😁
Advantages
When deploying a Worker service on the Serverless platform:
- You can easily scale the number of Workers up to 100 nodes in an instant
- Deploy a new version of the Worker without downtime
- Monitor resource usage 24/7
- ...
Wrapping up
So in this post I've walked you through deploying a Worker-type service using Celery (Python) onto the BizflyCloud App Engine Serverless platform. This Serverless platform is currently 100% free, and you can use it to deploy many different types of applications.
Hope this post helps you out at work. Please UpVote and Follow me to catch more posts! Thank you all.
Any questions or feedback, feel free to message me on Telegram @HoangViet12!
If you're running into technical challenges or need help with systems, DevOps tools, I'm confident I can help. Get in touch at hoangviet.io.vn